- Home
- How to Make Coffee
- Descale Coffee Maker
How to Clean and Descale Your Coffee Maker - And Why It Matters

Let’s be honest. Most of us forget to clean our coffee makers as often as we should. We rinse the carafe, maybe wipe down the outside—but when was the last time you gave your machine a real deep clean?
If your coffee has started tasting a little off lately—or your machine is taking longer to brew—there’s a good chance it needs more than a rinse. It probably needs a proper cleaning and descaling.
Here’s why that matters... and exactly how to do it.
Why cleaning your coffee maker isn’t optional
Every time you brew a pot of coffee, a few things are left behind inside the machine:
- Oils from the coffee beans
- Mineral deposits from your water (especially if you have hard water)
- Mold and bacteria (yes, really—especially in the reservoir)
Over time, these build up and affect both the taste of your coffee and the
performance of your machine. Let things go too long, and you could be dealing with clogs, slow brews, or even machine failure.
Plus, nobody wants their morning cup flavored with stale oils or hidden gunk.
What’s the difference between cleaning and descaling?
Good question.
- Cleaning deals with the coffee oils, old grounds, and surface grime.
- Descaling removes the limescale buildup caused by minerals in your water.
You need both to keep your machine in top shape.
How to clean your coffee maker (the right way)
Here’s a simple, step-by-step routine you can follow once a week—or more often if you brew daily.
- Unplug the machine and let it cool down.
- Wash the removable parts—like the carafe, filter basket, and water reservoir—with warm, soapy water.
- Wipe down the exterior with a soft cloth or sponge.
- Scrub any stubborn build-up using a soft brush or a mix of baking soda and water.
Don’t forget to dry everything completely before reassembling.
How to descale your coffee maker
You only need to do this every 1–3 months, depending on your water quality and how often you brew.
Here’s how:
Option 1: Using White Vinegar
- Fill the reservoir with a 1:1 mix of white vinegar and water.
- Start a brew cycle—without coffee—until the carafe is half full.
- Turn off the machine and let it sit for 30–60 minutes.
- Resume the cycle to finish brewing.
- Rinse by running 2–3 full cycles with clean water.
Option 2: Using a Descaling Solution
You can buy descaling solutions made specifically for coffee makers. Just follow the instructions on the label—they’re often gentler on your machine than vinegar.
Signs it’s time to clean or descale
- Your coffee tastes bitter, metallic, or sour
- The machine takes longer to brew than usual
- You notice white, chalky residue in or around the reservoir
- The machine sounds different or struggles to complete a cycle
A cleaner machine means better coffee
It’s that simple. Clean coffee makers produce cleaner-tasting coffee. And by staying on top of both cleaning and descaling, you’re also extending the life of your machine.
So set a reminder. Give your machine a little love. Your taste buds (and your wallet) will thank you.
Related Content:

How coffee benefits your health.
Drinking coffee is good for you in so many different ways, and actually protects you against some serious diseases and illnesses. Find out more here...
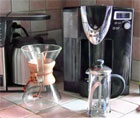
Which coffee maker is best for your home?
Drip brewers, single serve brewers, pour-over brewers, the French press. Find out which is best for you...
Sign up for the Coffee Culture Newsletter...
At Coffee Detective, we explore coffees, coffee gear and coffee-making best practices. Our companion publication -- The Coffee Culture Newsletter -- explores the cultures, the rituals, and the human story of coffee.
A FREE issue at least twice a month & shorter notes in between.


Celebrating 20 years of sharing our passion for coffee
Sign up for the Coffee Culture Newsletter...
At Coffee Detective, we explore coffees, coffee gear and coffee-making best practices. Our companion publication -- The Coffee Culture Newsletter -- explores the cultures, the rituals, and the human story of coffee.
A FREE issue at least twice a month & shorter notes in between.